The semimonthly headquarters message for FamilySearch Indexing (FSI) on 16-May-2008 gave some great hints for adjusting highlights. Unfortunately, without illustrations, my brain glazed over and I got little from the message. Here's my version of the message, with illustrations added.
Adjusting Highlights
You've seen projects with highlighting on the document image that shows you what information goes in the current field at the bottom of the page. Sometimes highlights are off for the whole document and little corrections using Ctrl + Alt + an arrow key just won't hack it.
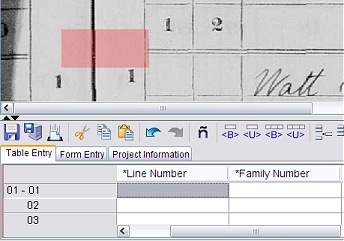
Sometimes the highlights are way off for the whole page.
To adjust the highlights for the entire page:
- First, try each highlight choice from the drop-down list at the top of the page.
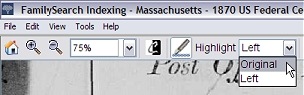
Try each highlight choice to see which is best. - If that doesn't resolve the problem, switch to Adjust Highlights Mode. Click the View menu and then click Adjust Highlights.
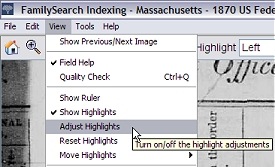
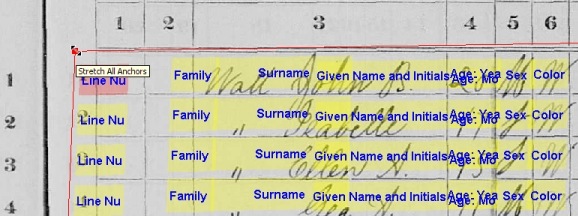
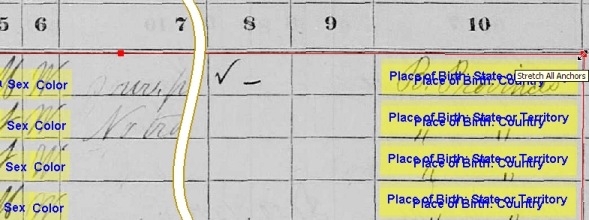
Click View and then Adjust Highlights. - You won't notice anything different until you move your mouse pointer over the information you are indexing. A grid of yellow boxes appears within a red border. Each yellow box shows where a highlight will appear. Blue text on each yellow box indicates the field name. You will use the red squares on the four corners of the red border to adjust all the highlights on the page.
- Click on the red box on the upper-left corner of the border. While holding the mouse button down, drag the red box around until the yellow boxes line up properly. Pay particular attention to thin columns, such as Age, Sex and Color in the illustration below. Look to see that the first row of highlights is positioned within the first row of the record. When positioned correctly, release the mouse button.
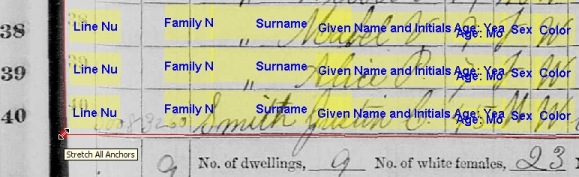
Position the upper-left corner. - Next reposition the upper-right corner. It doesn't matter if the yellow boxes fit exactly in the columns of the record. What's important is that when you're indexing the highlights will be close enough to the proper row and column so that you can identify the proper data to index.
Position the upper-right corner. - After the top 2 corners, do the lower-right corner. Look to see that the last row of yellow boxes lines up with the last row of the document. Again, make certain that thin columns line up properly and other columns line up acceptably.
Position the lower-left corner. - Finally, do the lower-right corner.
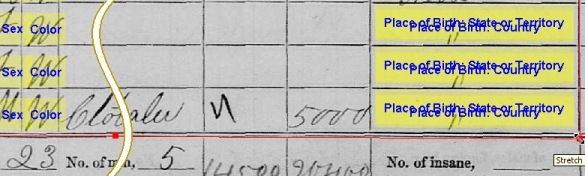
Position the lower-right corner. - To get out of Adjust Highlights Mode, again click View on the menu and then click Adjust Highlights.
And with that, all the highlights should be positioned where they should be. Well, close enough, anyway.
No comments:
Post a Comment
Note: Only a member of this blog may post a comment.